
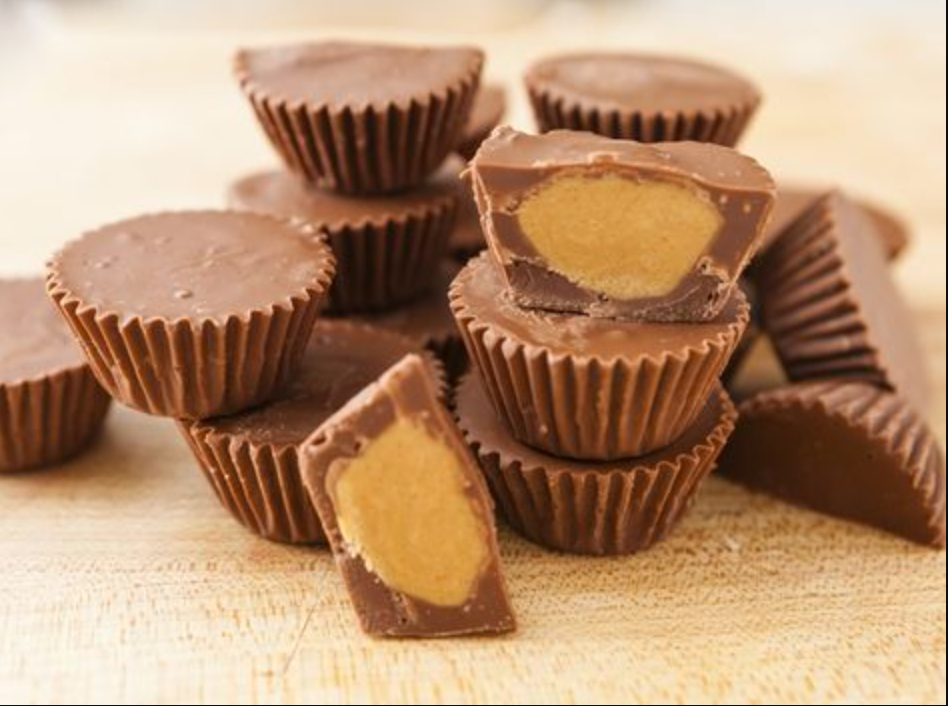
Sugar-Free Peanut Butter Cups: A Diabetic-Friendly Treat
Written and tested by Lylia, home cook and recipe developer. Nutritional estimates calculated using standard USDA ingredient data. This article is for general informational purposes only and is not medical or dietary advice. If you’re managing diabetes or another blood sugar condition, please talk with your doctor or a registered dietitian before making changes to your diet.
Craving chocolate and peanut butter but watching your blood sugar? These homemade sugar-free peanut butter cups are a lower-carb treat you can make in your own kitchen. Made with dark chocolate, natural peanut butter, and sugar-free sweeteners, each cup contains an estimated 3g of net carbs based on the ingredients used — lower than most store-bought candy, though your own results will depend on the exact products you choose and your individual body.
They’re ready in about 30 minutes with no baking required.
Recipe Details
| Prep Time | 15 minutes |
| Chill Time | 15–20 minutes |
| Total Time | 30–35 minutes |
| Servings | 12 peanut butter cups |
| Difficulty | Easy |
Estimated Nutrition (Per Cup)
These figures are calculated estimates based on typical ingredient values, not lab-tested measurements. Actual values will vary depending on the specific brands you use.
| Nutrient | Amount |
|---|---|
| Calories | ~95 |
| Net Carbs | ~3g |
| Total Carbs | ~5g |
| Protein | ~3g |
| Fat | ~8g |
| Fiber | ~2g |
| Sugar | ~0.5g (naturally occurring) |
A note on glycemic response: You may see recipes online that assign a precise glycemic index or glycemic load number to a homemade dish. Without lab testing, this isn’t something that can be stated as fact — glycemic response depends on the exact ingredients, portion size, what you eat it with, and your own body’s response. The American Diabetes Association notes that checking your own blood glucose before and after a meal is a more reliable way to understand how a specific food affects you than relying on a generic index number, and Mayo Clinic frames the glycemic index as one helpful tool among many rather than a guarantee.
Ingredients
For the Chocolate Shell
- 6 oz (170g) sugar-free dark chocolate chips (85% cacao or higher)
- 1 tablespoon (14g) coconut oil
- Optional: 10–15 drops liquid stevia for extra sweetness
For the Peanut Butter Filling
- ½ cup (130g) natural peanut butter (no added sugar)
- 2 tablespoons (28g) coconut flour or almond flour
- 2 tablespoons (30ml) sugar-free maple syrup, or 20 drops liquid stevia
- ⅛ teaspoon sea salt
- ½ teaspoon vanilla extract
Optional Toppings
- Flaky sea salt
- Chopped peanuts
Equipment Needed
- 12-cup mini muffin tin
- 12 mini muffin paper liners
- Microwave-safe bowl or double boiler
- Small mixing bowl
- Spoon or small cookie scoop
- Refrigerator or freezer
Instructions
1. Prepare the muffin tin. Line a mini muffin tin with 12 paper liners. Have all ingredients measured and ready.
2. Melt the chocolate. In a microwave-safe bowl, combine the chocolate chips and coconut oil. Microwave in 30-second intervals, stirring between each, until smooth (about 1–2 minutes total). Stir in stevia if using.
3. Create the bottom layer. Spoon about 1 teaspoon of melted chocolate into each liner, just enough to cover the bottom. Tap the tin gently to smooth it out, then freeze for 5 minutes to set.
4. Make the peanut butter filling. While the chocolate sets, mix the peanut butter, coconut flour, sugar-free syrup (or stevia), salt, and vanilla in a small bowl until well combined. The mixture should be thick and moldable.
5. Add the filling. Remove the tin from the freezer. Roll the peanut butter mixture into 12 small balls, flatten each slightly, and press one onto each chocolate base.
6. Cover with chocolate. Spoon the remaining melted chocolate over each filling, covering it completely. Smooth the tops with the back of a spoon and tap the tin gently to release air bubbles.
7. Add toppings (optional). Sprinkle with flaky sea salt or crushed peanuts while the chocolate is still wet.
8. Final chill. Refrigerate for 15–20 minutes, or freeze for 10 minutes, until fully set.
9. Store and enjoy. Remove from the tin, peel off the liners, and store in an airtight container in the fridge.
Tips From Testing This Recipe
- Chocolate choice: Look for dark chocolate labeled 85% cacao or higher — generally, the higher the percentage, the less sugar it contains. Several brands make sugar-free or no-sugar-added dark chocolate chips; check the nutrition label rather than relying on marketing claims, since formulations change.
- Peanut butter: Read labels carefully. Many “natural” peanut butters still contain added sugar or oils. Look for a short ingredient list — ideally just peanuts and salt.
- Make-ahead: These freeze well. Make a double batch and store in the freezer for up to 3 months.
- Texture troubleshooting: If the peanut butter filling is too runny, add more coconut flour a teaspoon at a time. If it’s too dry or crumbly, add a little more peanut butter.
- Natural separation: Natural peanut butter separates, with oil rising to the top. Stir well before measuring for consistent results.
Variations
- Almond Butter Cups: Swap in unsweetened almond butter for a slightly lower-carb version.
- White Chocolate Version: Use sugar-free white chocolate for the coating, and add a teaspoon of cocoa powder to the filling for contrast.
- Extra-Dark Chocolate: Try 90–95% cacao chocolate for an even lower sugar content (it will taste more bitter).
- Crunchy Version: Fold a tablespoon of chopped peanuts into the filling.
- Nut-Free Option: Replace peanut butter with coconut butter (coconut manna).
Serving Suggestions
- As an after-dinner dessert
- With black coffee or unsweetened tea as an afternoon snack
- Alongside a few fresh berries for extra fiber and micronutrients
- With unsweetened almond milk or a cinnamon herbal tea
A Note for Readers Managing Diabetes
Combining fat, fiber, and protein — as this recipe does with peanut butter, coconut oil, and dark chocolate — is a well-established general strategy that may help slow the absorption of the carbohydrates that are present, compared to eating sugar alone. The American Diabetes Association’s Diabetes Plate method recommends pairing carbs with protein or healthy fat for exactly this reason. That said:
- Everyone’s blood sugar response is different. Factors like medication, insulin sensitivity, activity level, portion size, and what else you’ve eaten that day all affect your results.
- Sugar alcohols and sweeteners aren’t identical. Ingredients like sugar-free maple syrup or stevia-based products vary by brand, and some sugar alcohols can cause digestive discomfort in larger amounts or, in some people, still affect blood glucose modestly. It’s also worth knowing that recent Cleveland Clinic research has linked the sugar alcohol erythritol — common in many “sugar-free” chocolate products — to increased cardiovascular risk markers, so it’s a reasonable thing to ask your doctor about if you have heart disease, diabetes, or metabolic syndrome. Check the label of your specific product, and look up its sweetener before assuming all “sugar-free” options are interchangeable.
- This article isn’t a substitute for professional guidance. If you have diabetes or another condition affecting blood sugar, the most reliable way to know how a food affects you is to check your own blood glucose, and to review new recipes or ingredients with your doctor or a registered dietitian — especially if you take insulin or other glucose-lowering medication.
If you’d like to see how this recipe affects you personally, consider checking your blood sugar before eating, then again about 1 and 2 hours afterward, and comparing that with your usual response to a typical dessert. Individual results vary, so use this as a personal data point rather than an expectation to match.
Storage
- Refrigerator: Up to 2 weeks in an airtight container. Layer with parchment paper to prevent sticking.
- Freezer: Up to 3 months in a freezer-safe container. Eat straight from frozen for a firmer, fudge-like texture.
- Room temperature: Not recommended — these soften and lose their shape within 1–2 hours due to the coconut oil content.
Frequently Asked Questions
Can I use regular chocolate chips? Regular chocolate chips typically contain significantly more sugar per serving than sugar-free or high-percentage dark chocolate, so they’ll have a bigger impact on carb and sugar content. Stick with sugar-free chips or dark chocolate at 85% cacao or higher.
How does this compare to store-bought peanut butter cups? Based on typical nutrition labels, standard candy peanut butter cups run noticeably higher in both carbs and sugar per serving than this homemade version. Always check the actual label of whatever you’re comparing against, since formulations vary by brand.
Can I make these without coconut flour? Yes — almond flour or unflavored protein powder both work as binders. Finely ground oats will work too, but will add more carbohydrates.
Do these need to be refrigerated? Yes. Because of the coconut oil and natural peanut butter, they soften at room temperature and hold their shape best when chilled.
Are these appropriate for a ketogenic diet? With roughly 3g of net carbs per cup, they can fit into many low-carb or ketogenic eating patterns, but check your own daily carb targets and total intake.
Can kids eat these? These are generally a lower-sugar alternative to typical candy, but as with any recipe containing peanuts, be mindful of nut allergies.
Recipe Notes
- Don’t skip the freezing step between layers — it keeps the filling from mixing into the chocolate shell.
- If your chocolate thickens while you’re working, reheat it in 10–15 second bursts in the microwave.
- Sweetness is adjustable — start with less stevia and add more to taste, since it’s easier to add than to remove.
- Paper liners make removal simple, but silicone molds work well too.
Sources & Further Reading
- American Diabetes Association – Why the Glycemic Index Isn’t a Helpful Tool and What to Do Instead
- Mayo Clinic – Low-Glycemic Index Diet: What’s Behind the Claims?
- Cleveland Clinic – Evidence Mounts That Sugar Substitute Erythritol Raises Cardiovascular Risk
- USDA FoodData Central – used as the general reference basis for the nutrition estimates in this recipe
Disclaimer: This recipe and its nutritional estimates are provided for general informational purposes and have not been evaluated by a medical professional or laboratory-tested. They are not a substitute for personalized medical or dietary advice. Please consult your doctor or a registered dietitian regarding any health condition, including diabetes.
One Comment